Report
of the St. Petersburg Alpine Federation team on the ascent of Sel'dy peak (3664 m) via the Southwest wall
The proposed category of complexity is 3A
Eastern Caucasus.
Team leader: Kirill A. Mazurov Team coach: Tatiana I. Timoshenko
St. Petersburg 2017
Ascent Passport
1. Region 2.10, Caucasus, Dagestan Mountains, Chekhychay River valley 2. Sel'dy peak, 3664 m, via the Southwest wall 3. Proposed category — 3A 4. Route type: rock climbing 5. Route elevation gain: 430 m according to GPS
Route length: 920 m. Section lengths:
- Category 5 difficulty — 10 m.
- Category 6 difficulty — none.
Average slope:
- Main part of the route — 31.5°
- Entire route — 28.5°
6. Number of pitons driven on the route:
Number of chocks — 13 pieces.
7. Team's total climbing time: 4.5 hours, 1 day 8. Team leader: Kirill A. Mazurov, 1st sports category
Team members:
- D.E. Tsaregorodtsev, 1st sports category
- P.Yu. Fominykh, 2nd sports category
9. Coach: T.I. Timoshenko, Master of Sports 10. Departure from Base Camp: at 6:30 on January 31, 2017
Route started: at 11:00 on January 31, 2017 Reached the summit: at 15:30 on January 31, 2017 Returned to Base Camp: at 22:00 on January 31, 2017 Descent from the summit: via the category 2A route on the Southwest couloir
11. Organization: St. Petersburg Alpine Federation, LETI Alpine Club 12. Report author: Kirill A. Mazurov
Email: mka_spb_leti@mail.ru
Brief Description of the Area
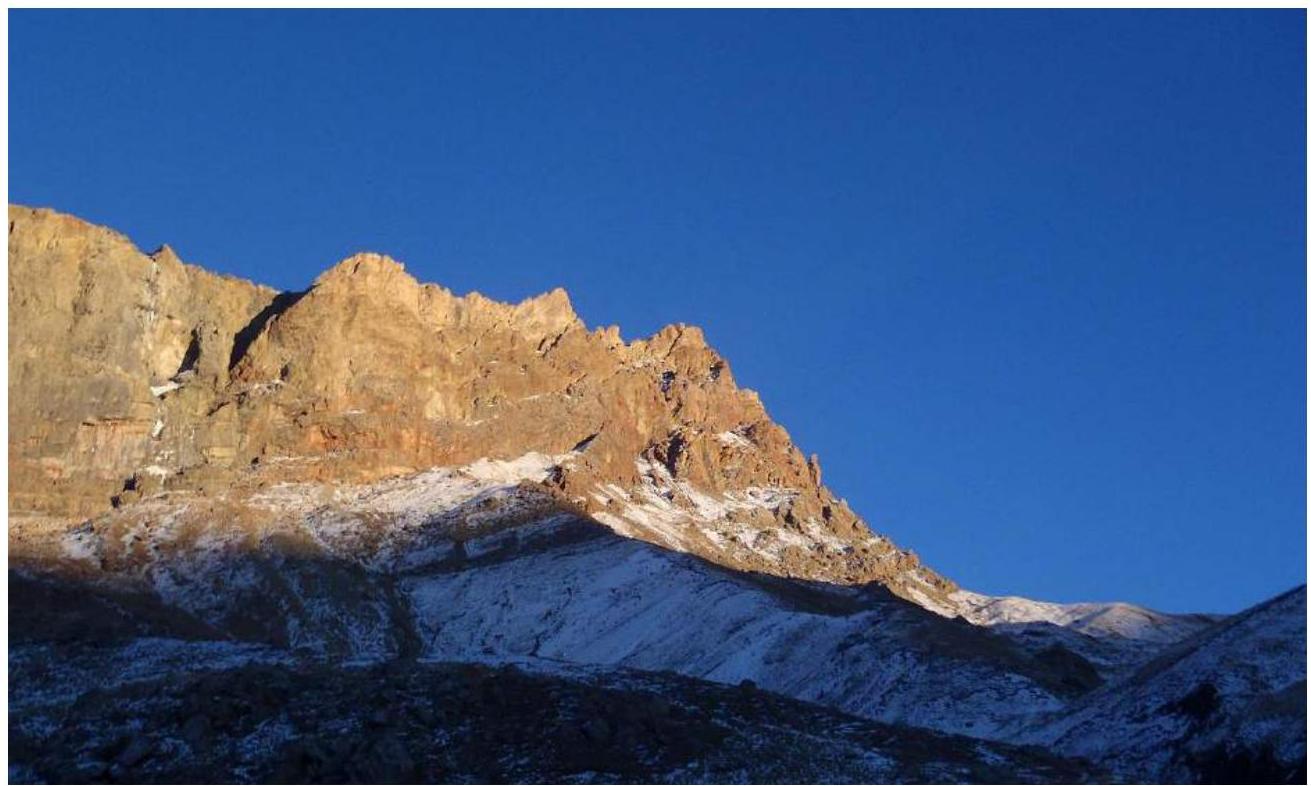
The Sel'dy peak massif is a continuation of the West wall of the Erydag peak and is essentially the southern part of the unified rocky outcrop of Erydag-Sel'dy. A map of the area is shown in Fig. 1.
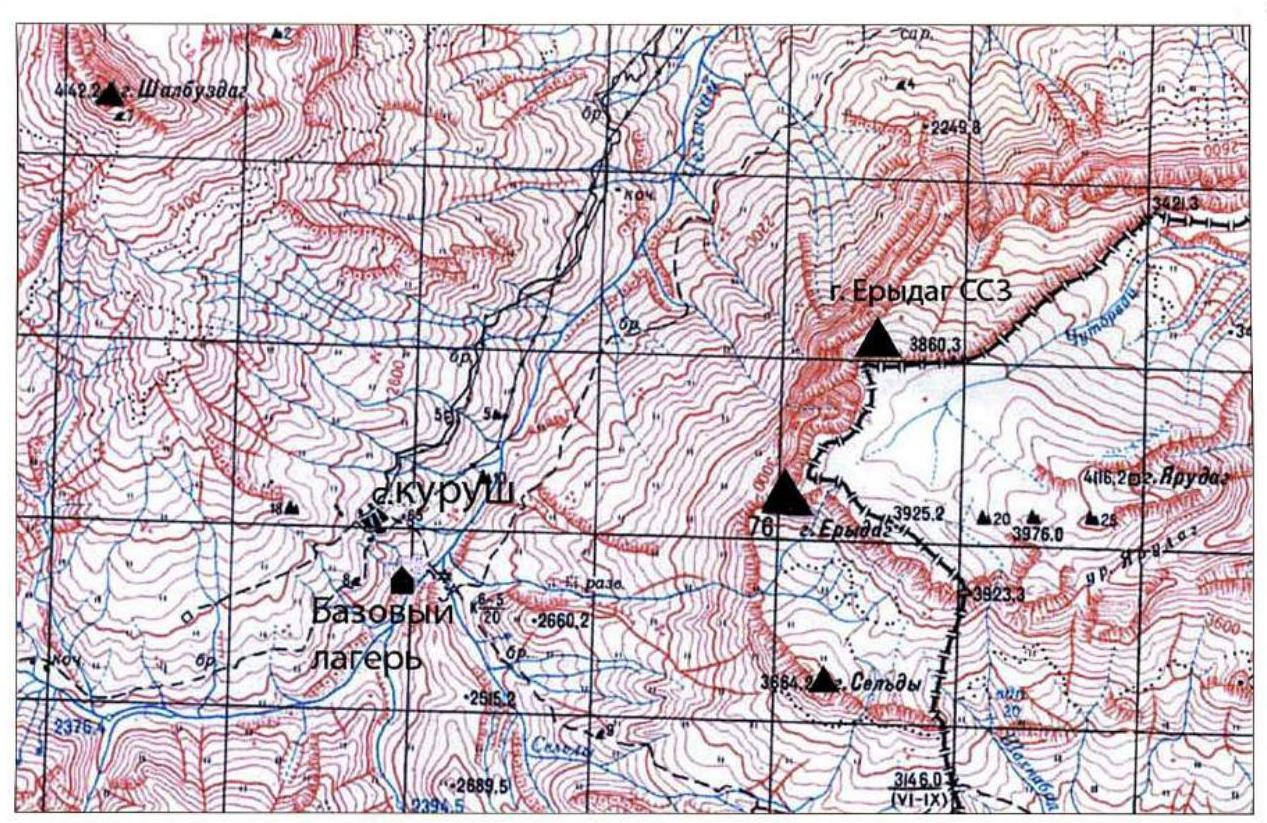
Fig. 1. Map of the area
This region is a popular location for winter training camps due to the convenient access to the base camp and favorable weather conditions. Until a few years ago, the base camp was usually set up in a meadow under the wall of Erydag peak, requiring the transportation of goods from the village of Kurush or from the river. Now it is more practical to set up the base camp in a hut near the river, which is accessible by car. The approach to the walls of Erydag and Sel'dy peaks from the hut takes about 30 minutes longer than from the meadow, but the hut is not exposed to the wind, and it has a stationary stove, bunks, tables, and lighting (if there is a working generator).
The area is attractive due to the abundance of routes of all difficulty categories — from 1B to 6B. At the same time, as of today, there is not a single classified route of category 3A on the wall of Erydag and Sel'dy peaks.
The route described in this report is not new and has been known for a long time. The author of the report climbed this route back in 2011, when he was a 3rd category climber.
The route is very useful for training groups, as it requires the application of various technical skills:
- ability to move on scree slopes;
- organization of belays on heavily damaged rocks;
- competent selection of belay stations;
- practice of simultaneous and alternate belays;
- passage of a challenging chimney with a plug.
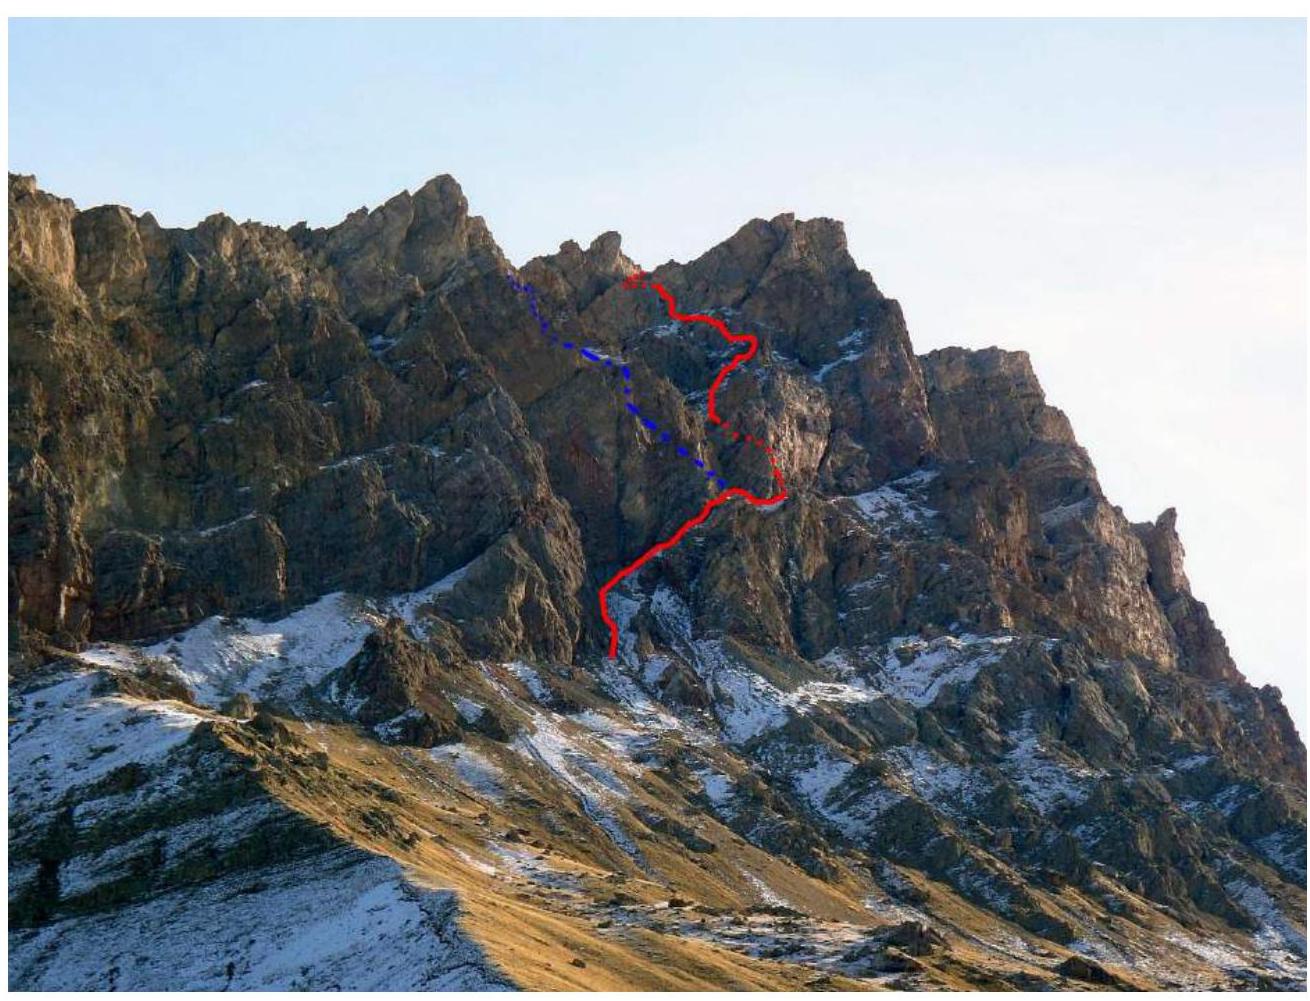
A general photo of the peak is shown in Fig. 2. The category 2A route on the Southwest couloir is marked in blue. The climbed route is marked in red.
Brief Technical Description of the Route Sections
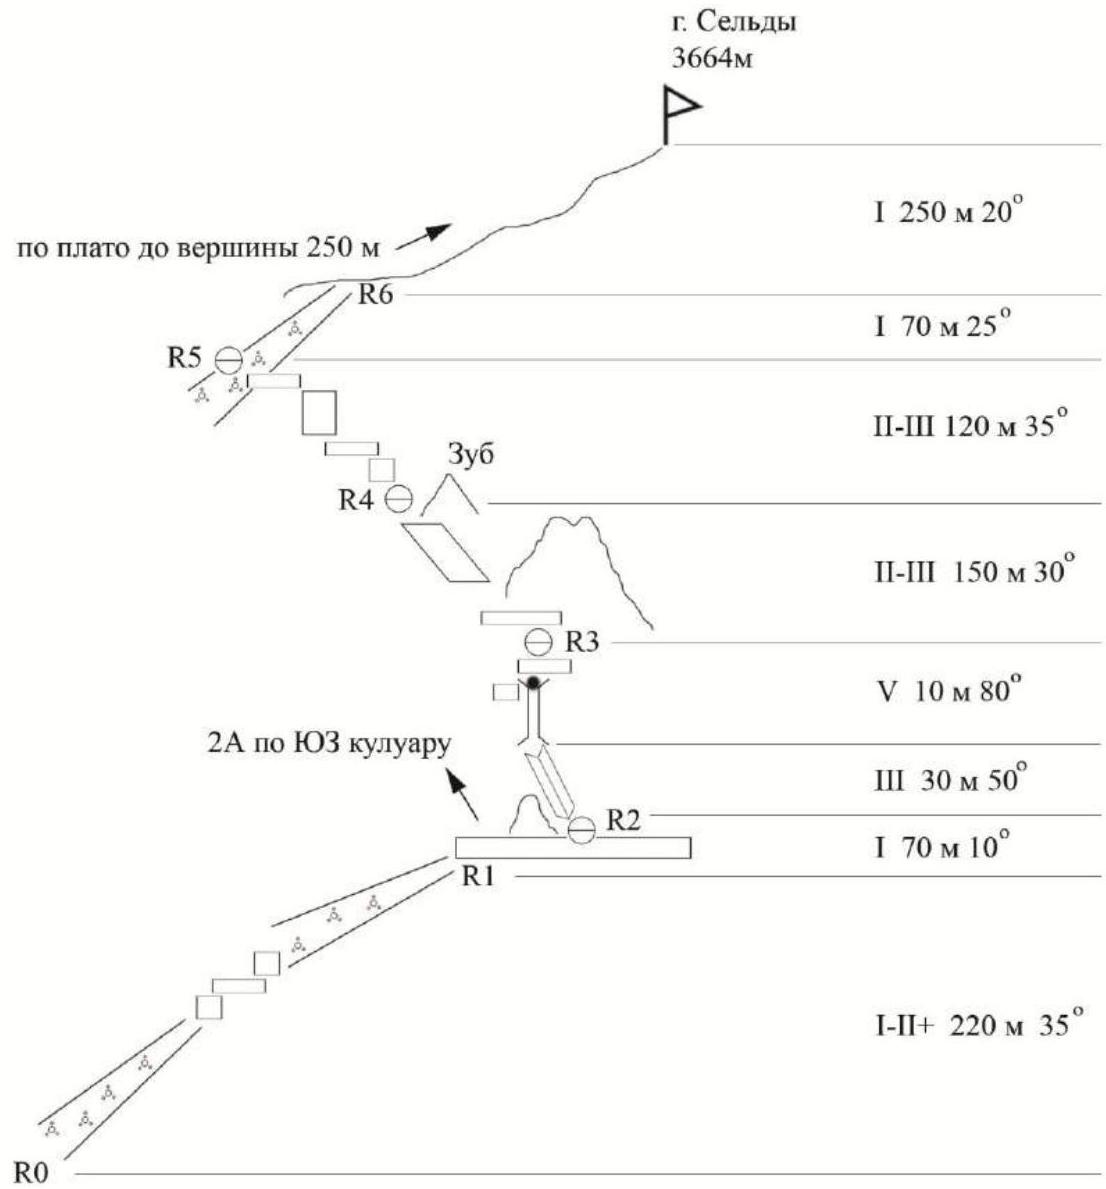
Fig. 3. Route diagram in UIAA symbols
| Section # | Length, m | Slope, ° | Terrain type | Difficulty category | Number of pitons |
|---|---|---|---|---|---|
| R0–R1 | 220 | 35 | Couloir, small and medium scree | I–II+ | |
| R1–R2 | 70 | 10 | Scree ledge | I | |
| R2–R3 | 40 | 57.5 | Couloir, chimney | III–V | 6 |
| R3–R4 | 150 | 30 | Damaged slope | II–III | 1 |
| R4–R5 | 120 | 35 | System of ledges and walls | II–III | 6 |
| R5–R6 | 70 | 25 | Scree ledge | I | |
| Plateau | 250 | 20 | Small and medium scree | I |
Departure from the base camp at 6:00–7:00. The time to the start of the route is approximately 3.5–4.5 hours. The beginning of the route coincides with the start of the category 2A route on the Southwest couloir (Fig. 4). A technical photograph of the route is shown in Fig. 5.
The R0–R1 section is a scree couloir. The lower part of the couloir is traversed along the left wall, followed by two small walls, and in the upper part of the couloir, it is easier to move to the right part. Under the scree, there are inclined slabs. If the participants lack experience in navigating heavily damaged rocks, traversing the couloir may take significant time.
At the top of the couloir, there is an opportunity to set up a belay/rappel station (a large boulder on scree) for safe passage of the walls marked on the diagram.
R1–R2 — a wide horizontal ledge, where the route diverges from the category 2A route on the Southwest couloir. The category 2A route goes left into the Southwest couloir, while the category 3A route goes around the rocky outcrop to the right along the ledge (Fig. 8).
Immediately behind the rocky outcrop, a characteristic gap is visible — this is the beginning of the R2–R3 section (Fig. 9).
R2–R3 can be divided into two subsections. The first 30 meters represent a wide and not very steep gap with a couple of challenging wall sections "for two moves".
The upper part of the gap transitions into a chimney with a plug, which is climbed "head-on", with the plug bypassed on the left along the wall (Fig. 10). There is a temptation to bypass the entire chimney on the left along the wall, but this option ends with an unpleasant traverse back to the plug in the upper part.
A group of 2–3 people can set up a belay station directly under the key chimney. For larger groups, it is recommended to set up a belay station at the very beginning of the R2–R3 gap, as the group can safely hide from falling rocks.
The rocks are heavily damaged in some places, and there is small to medium scree on the ledge above the chimney, so the risk of rockfall is high. After the key section, there are several meters of a gentle ledge to a station on a large boulder. The length of the rope is just enough from the start of the gap to the station.
From the start of the route to the station above the key section takes approximately 2.5 hours.
R3–R4 — from the R3 station, follow an obvious small ledge to a gendarme, which is bypassed on the left, with several meters of unpleasant traverse (Fig. 12). Then, proceed along damaged rocks towards the "tooth" (Fig. 13, Fig. 14). There are difficulties with organizing belays. The passage of this not very difficult section can be significantly complicated by the presence of snow; in 2011, the author of the report had to set up a rope on this section (Fig. 15).
The R4–R5 section represents a system of ledges and walls, which is traversed with a gain in height to the left (Fig. 16, Fig. 17). To the right, a chimney is visible, leading almost to the plateau. It is not recommended to climb it, as the climbing there is more suitable for a category 4 route rather than 3A (Fig. 18). R4–R5 ends with an exit to a wide scree ledge (Fig. 19).
R5–R6 — walking along the scree ledge leads to the plateau (Fig. 20). Then, follow the plateau to the summit of Sel'dy peak, 3664 m. From the station above the key section, it takes 2–2.5 hours. Photo at the summit (Fig. 21).
The descent to the base camp via the category 2A route on the Southwest couloir takes approximately 3.5–4.5 hours. Due to an injury to a participant in a group that climbed the category 2A route on the same day, our groups joined together and descended slowly, returning to the base camp around 22:00.
Photo Report
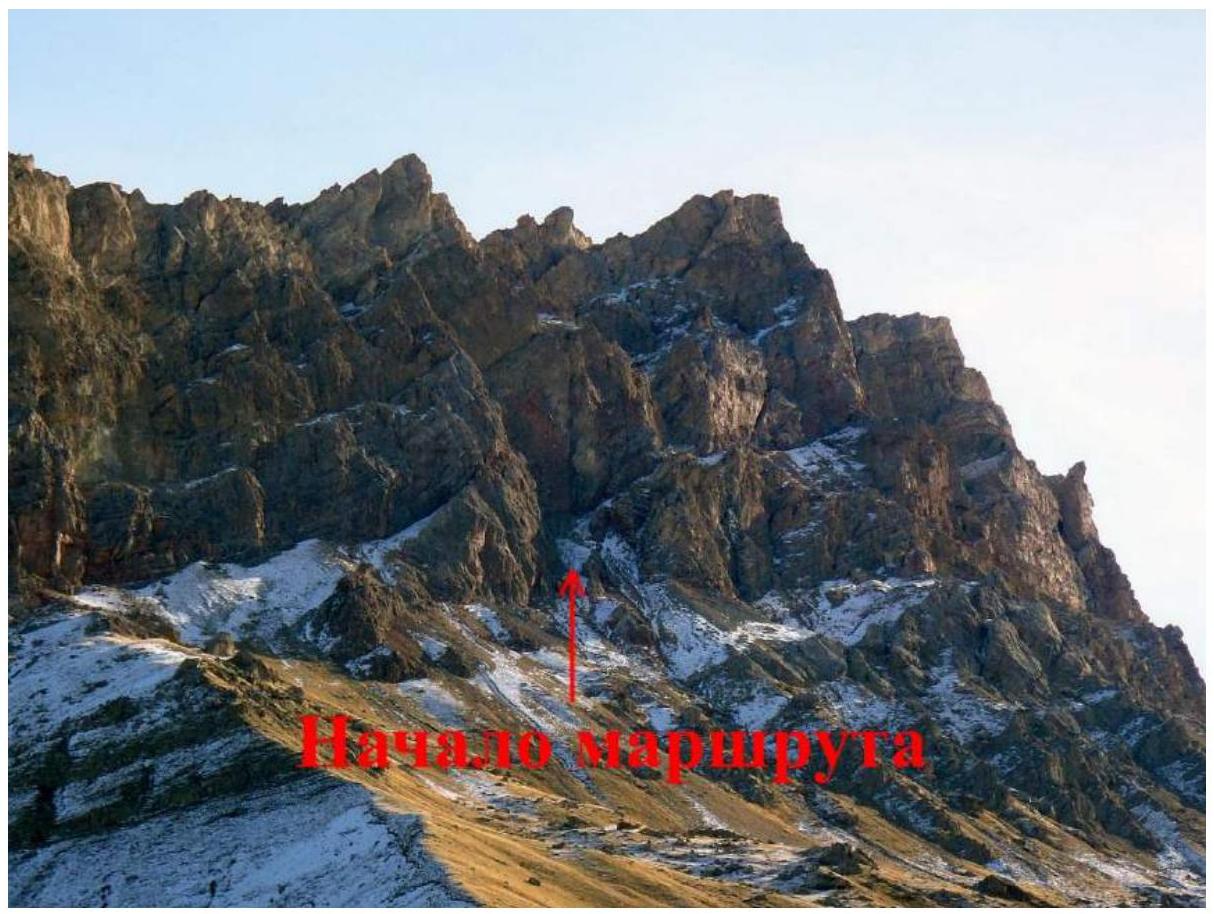
Fig. 4. Start of the route
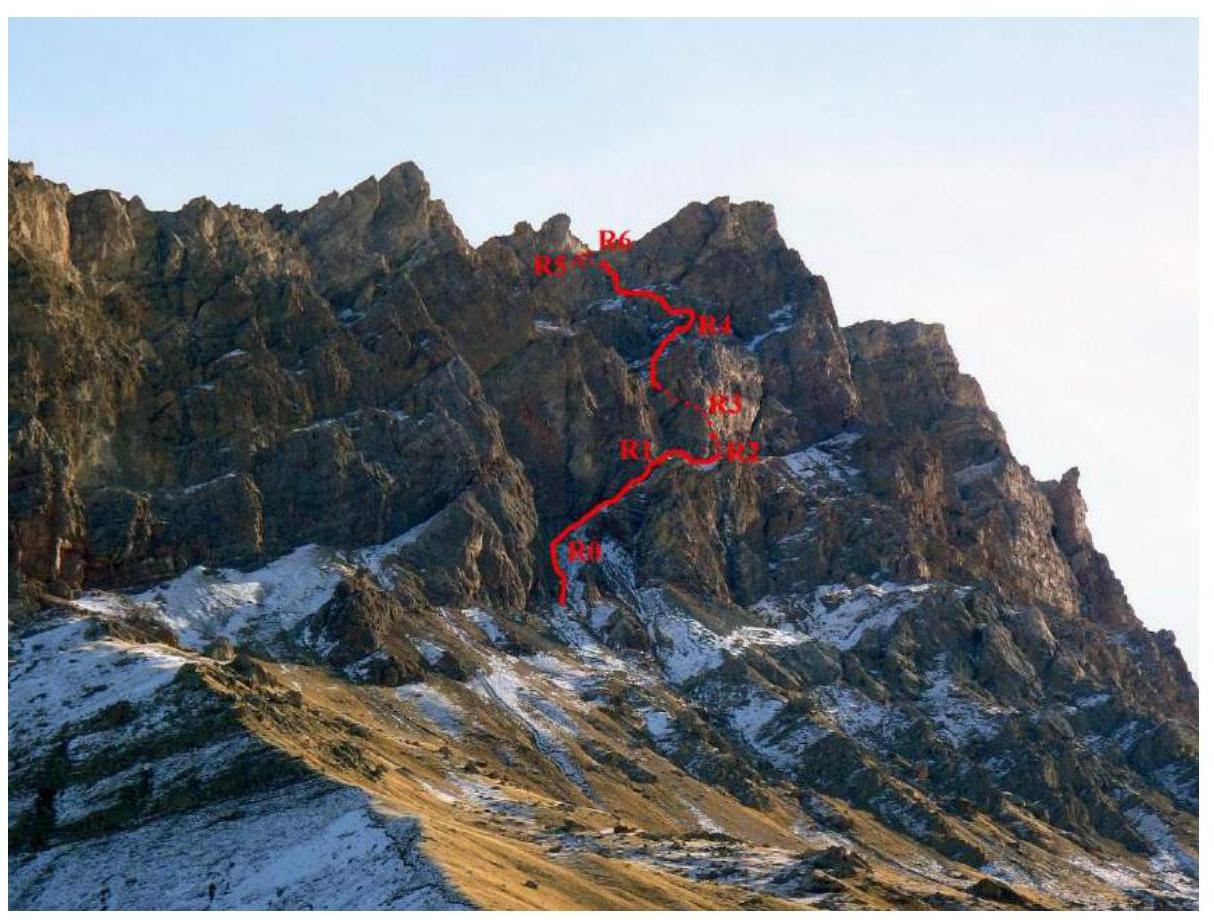
Fig. 5. Technical photograph of the route
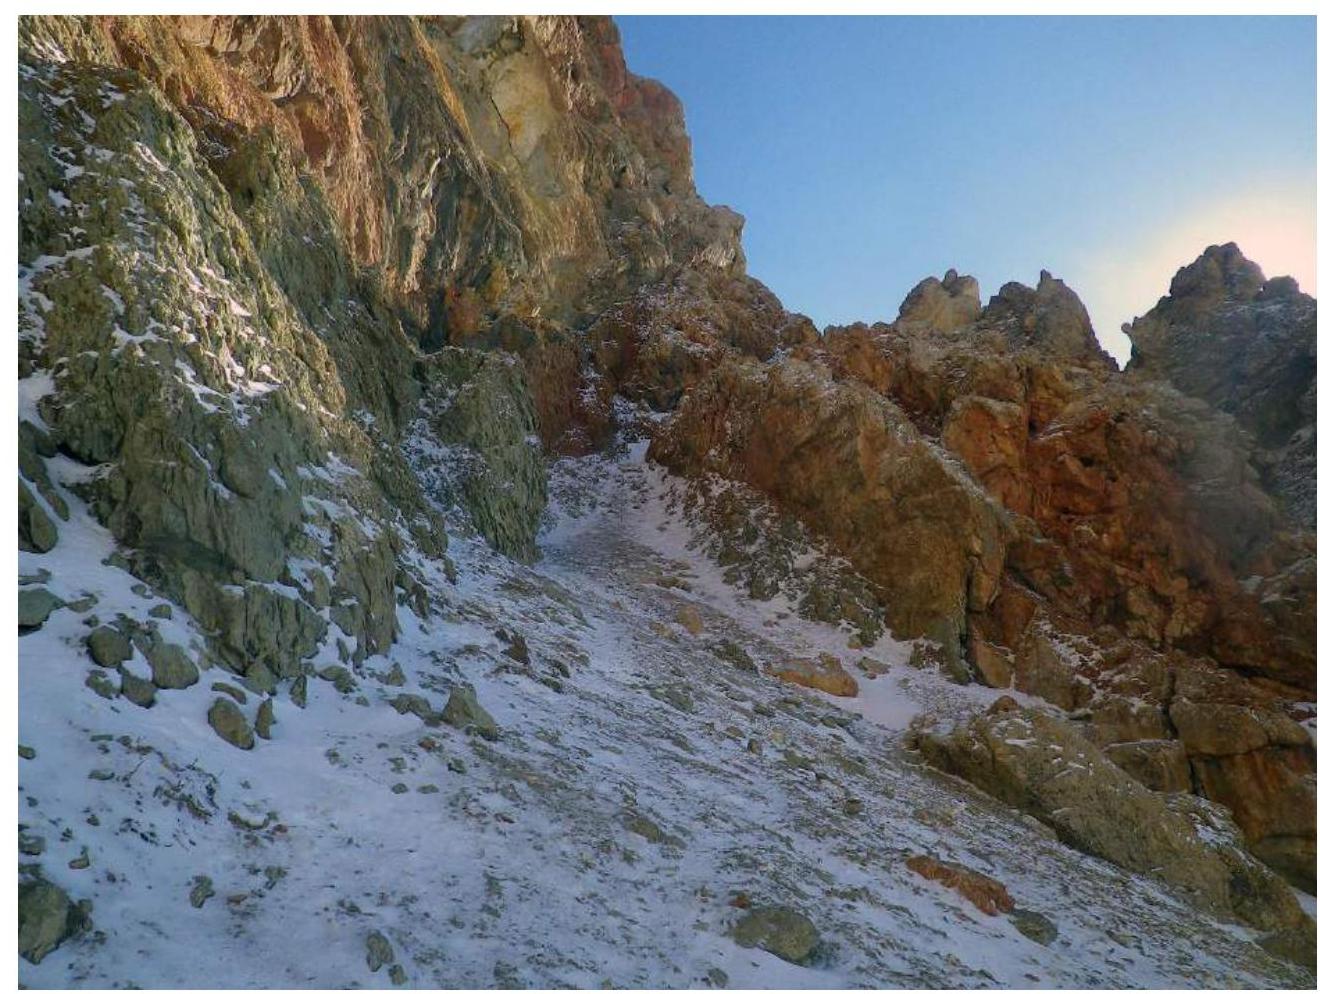
Fig. 6. Lower part of the R0–R1 couloir
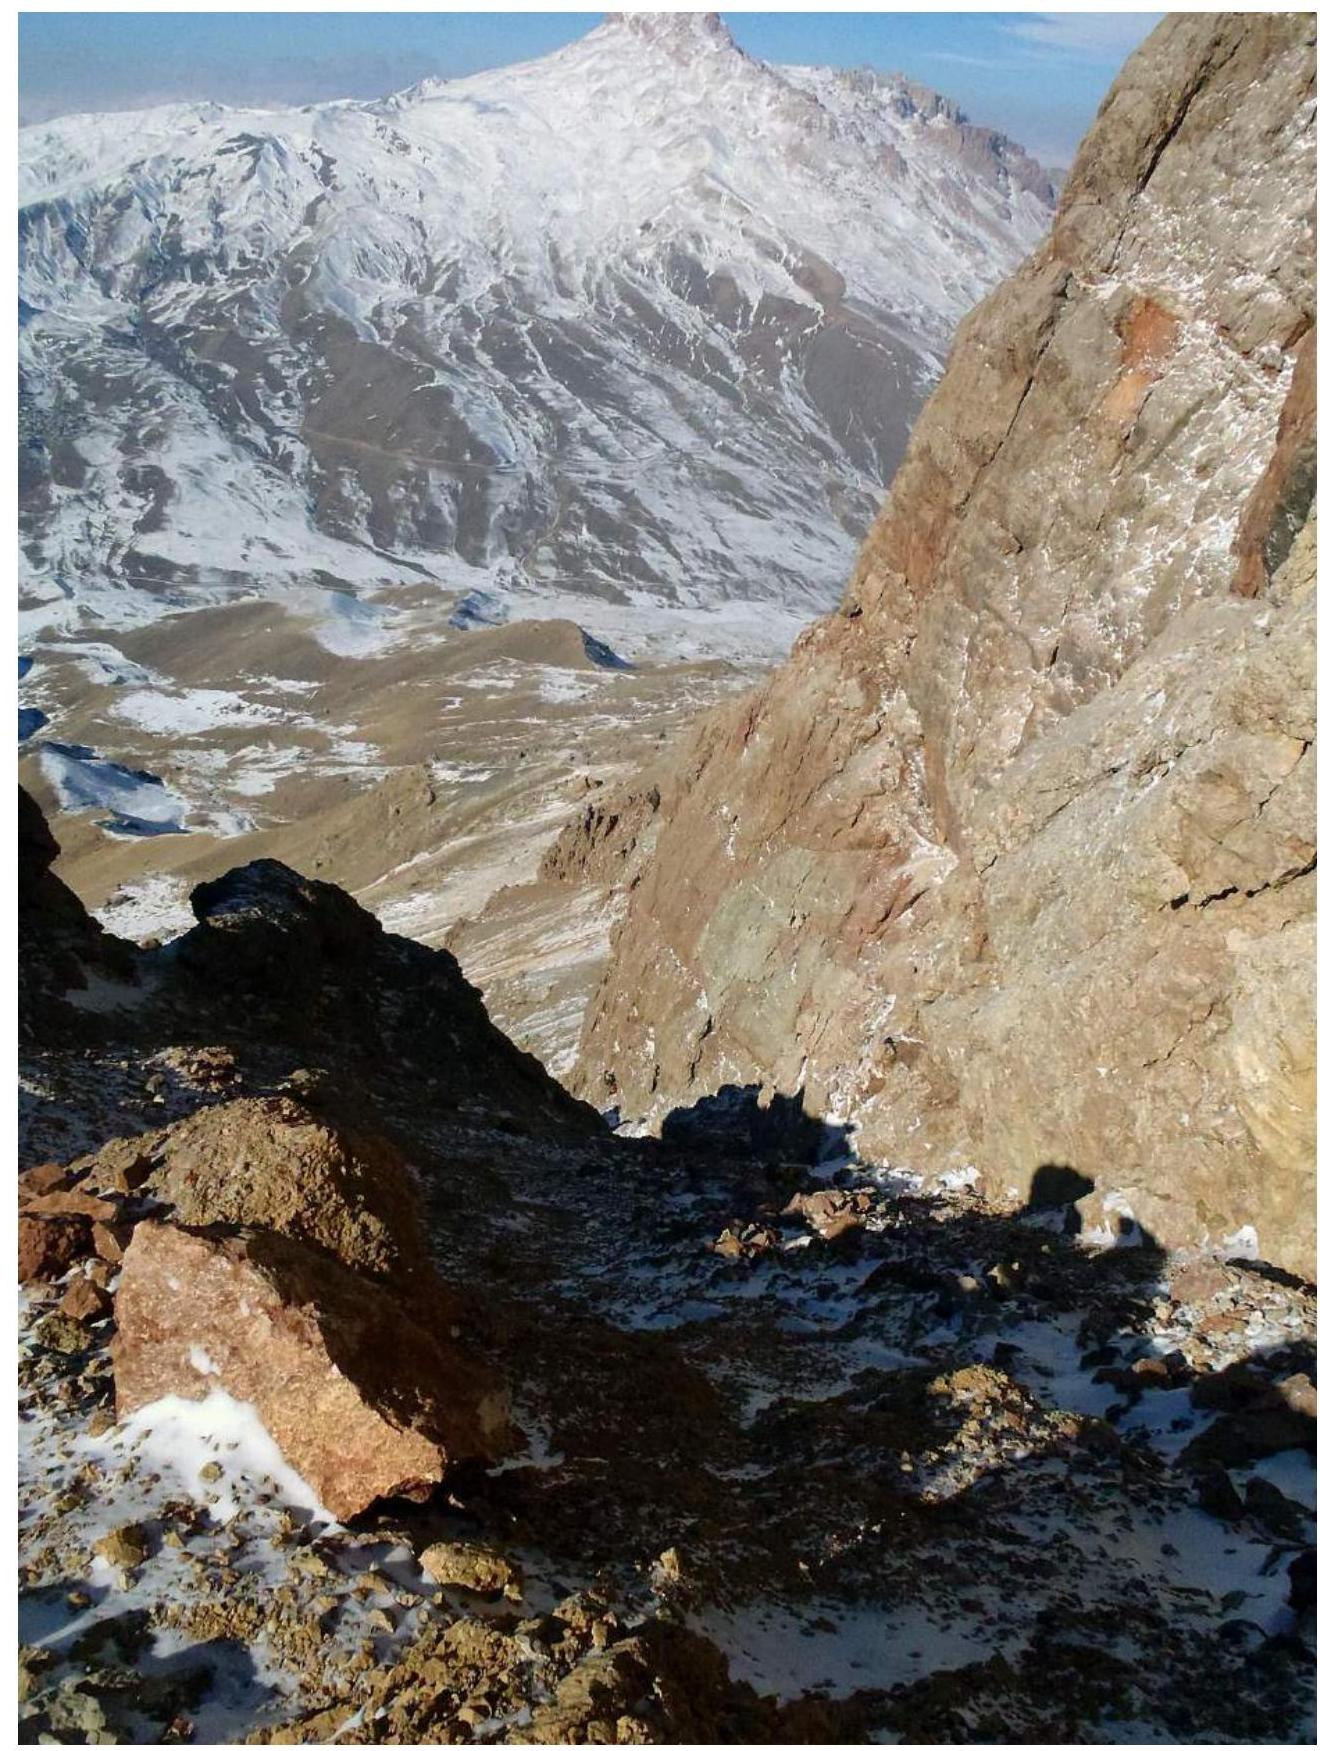
Fig. 7. Upper part of the R0–R1 couloir
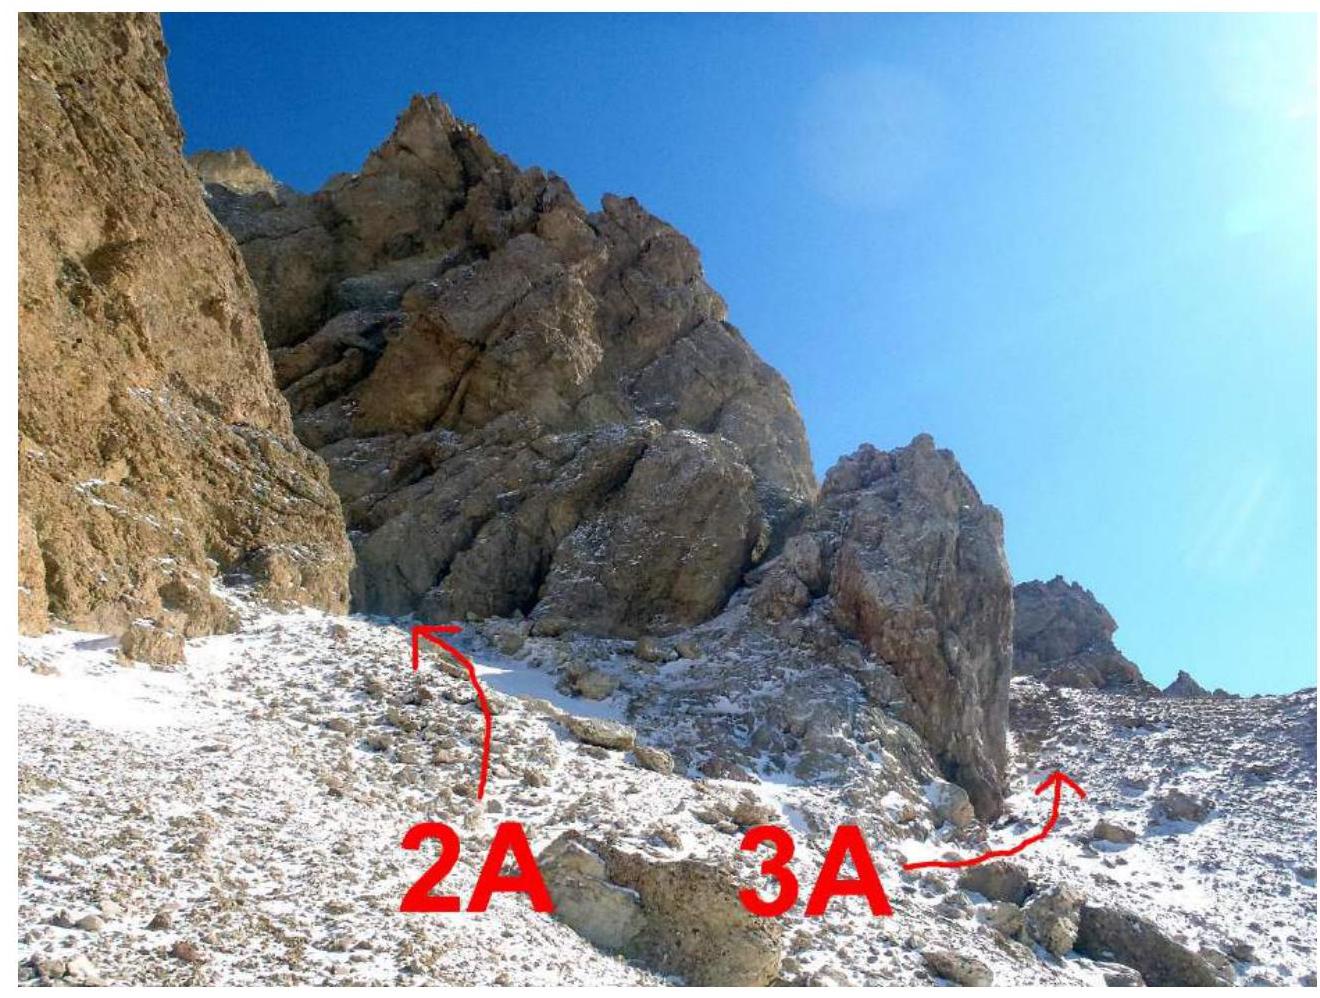
Fig. 8. Divergence of routes on the R1–R2 ledge
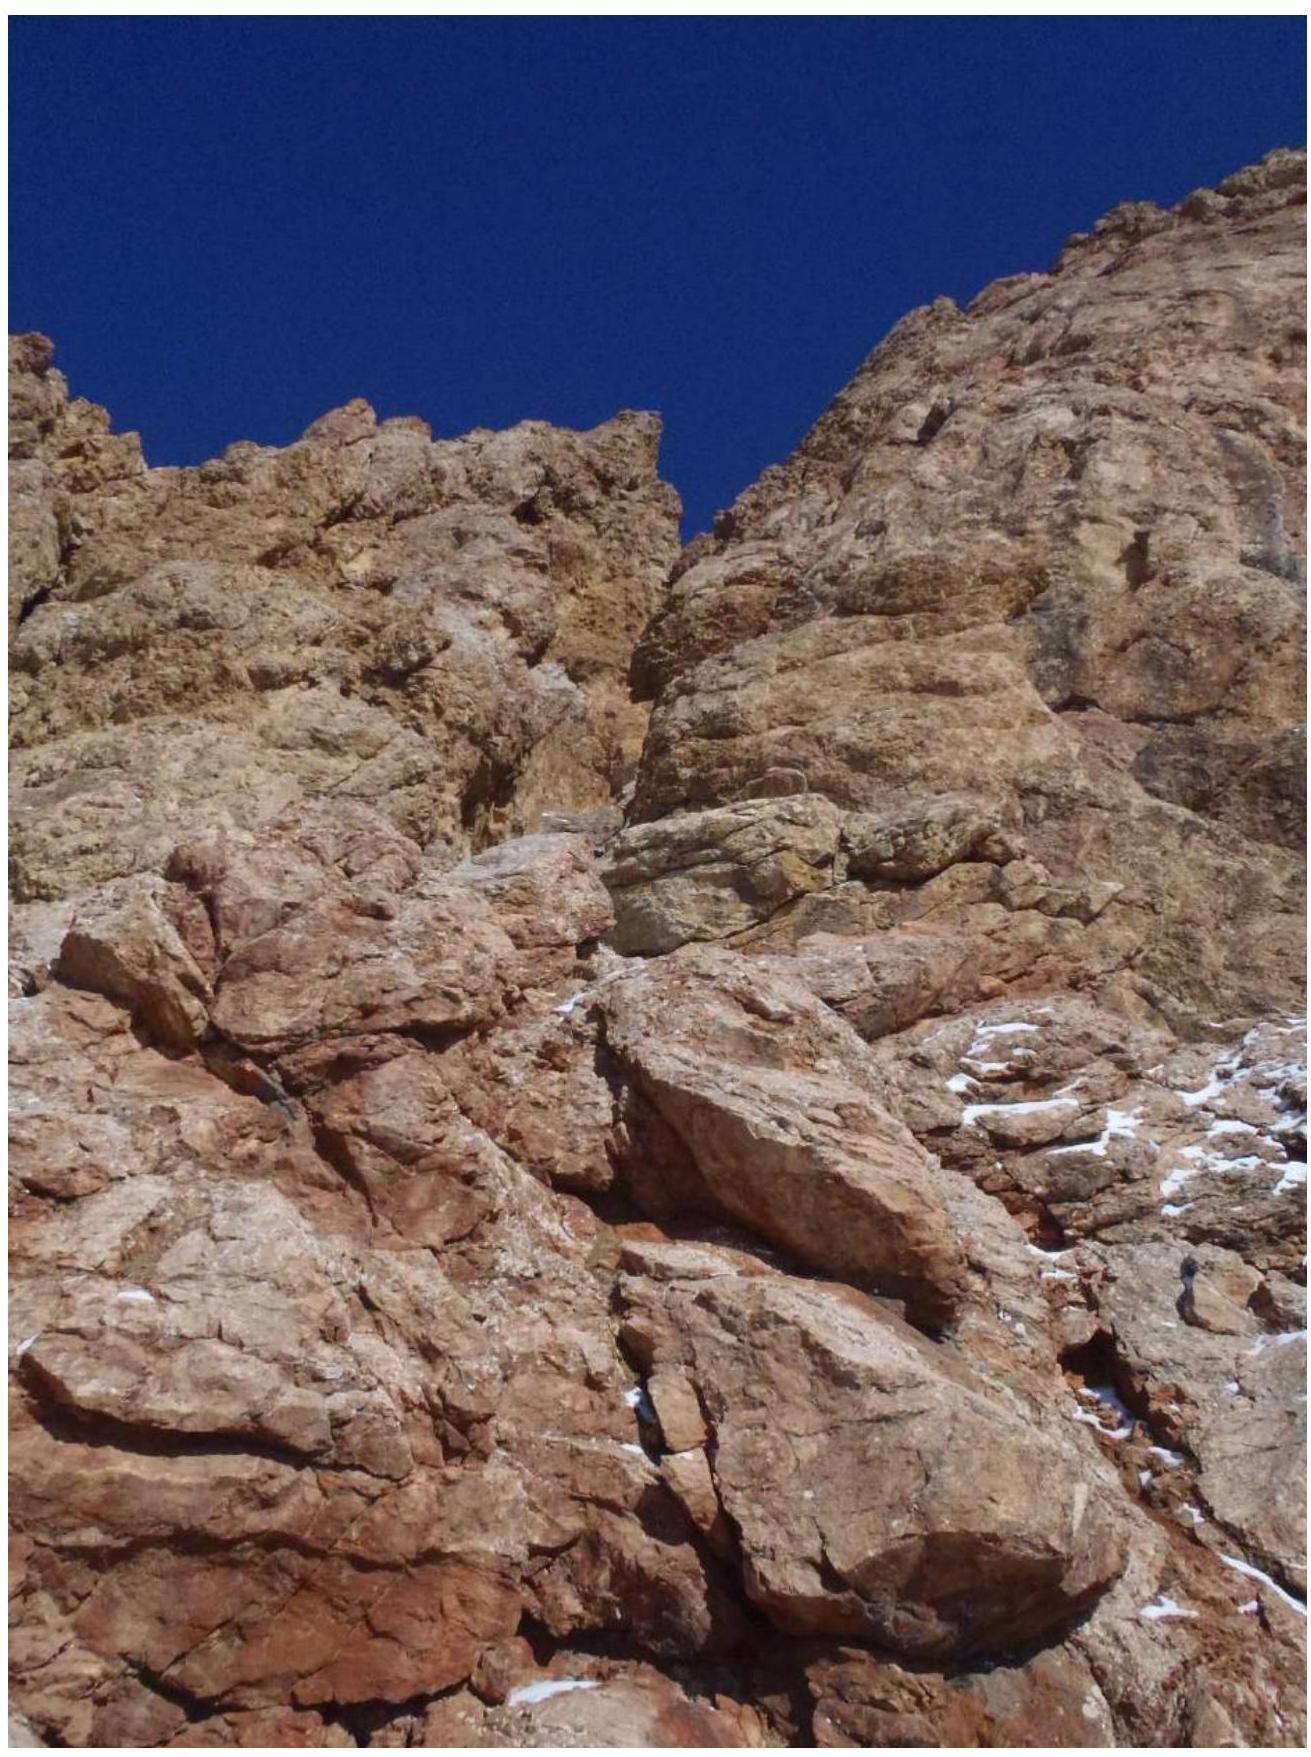
Fig. 9. Start of the R2–R3 section
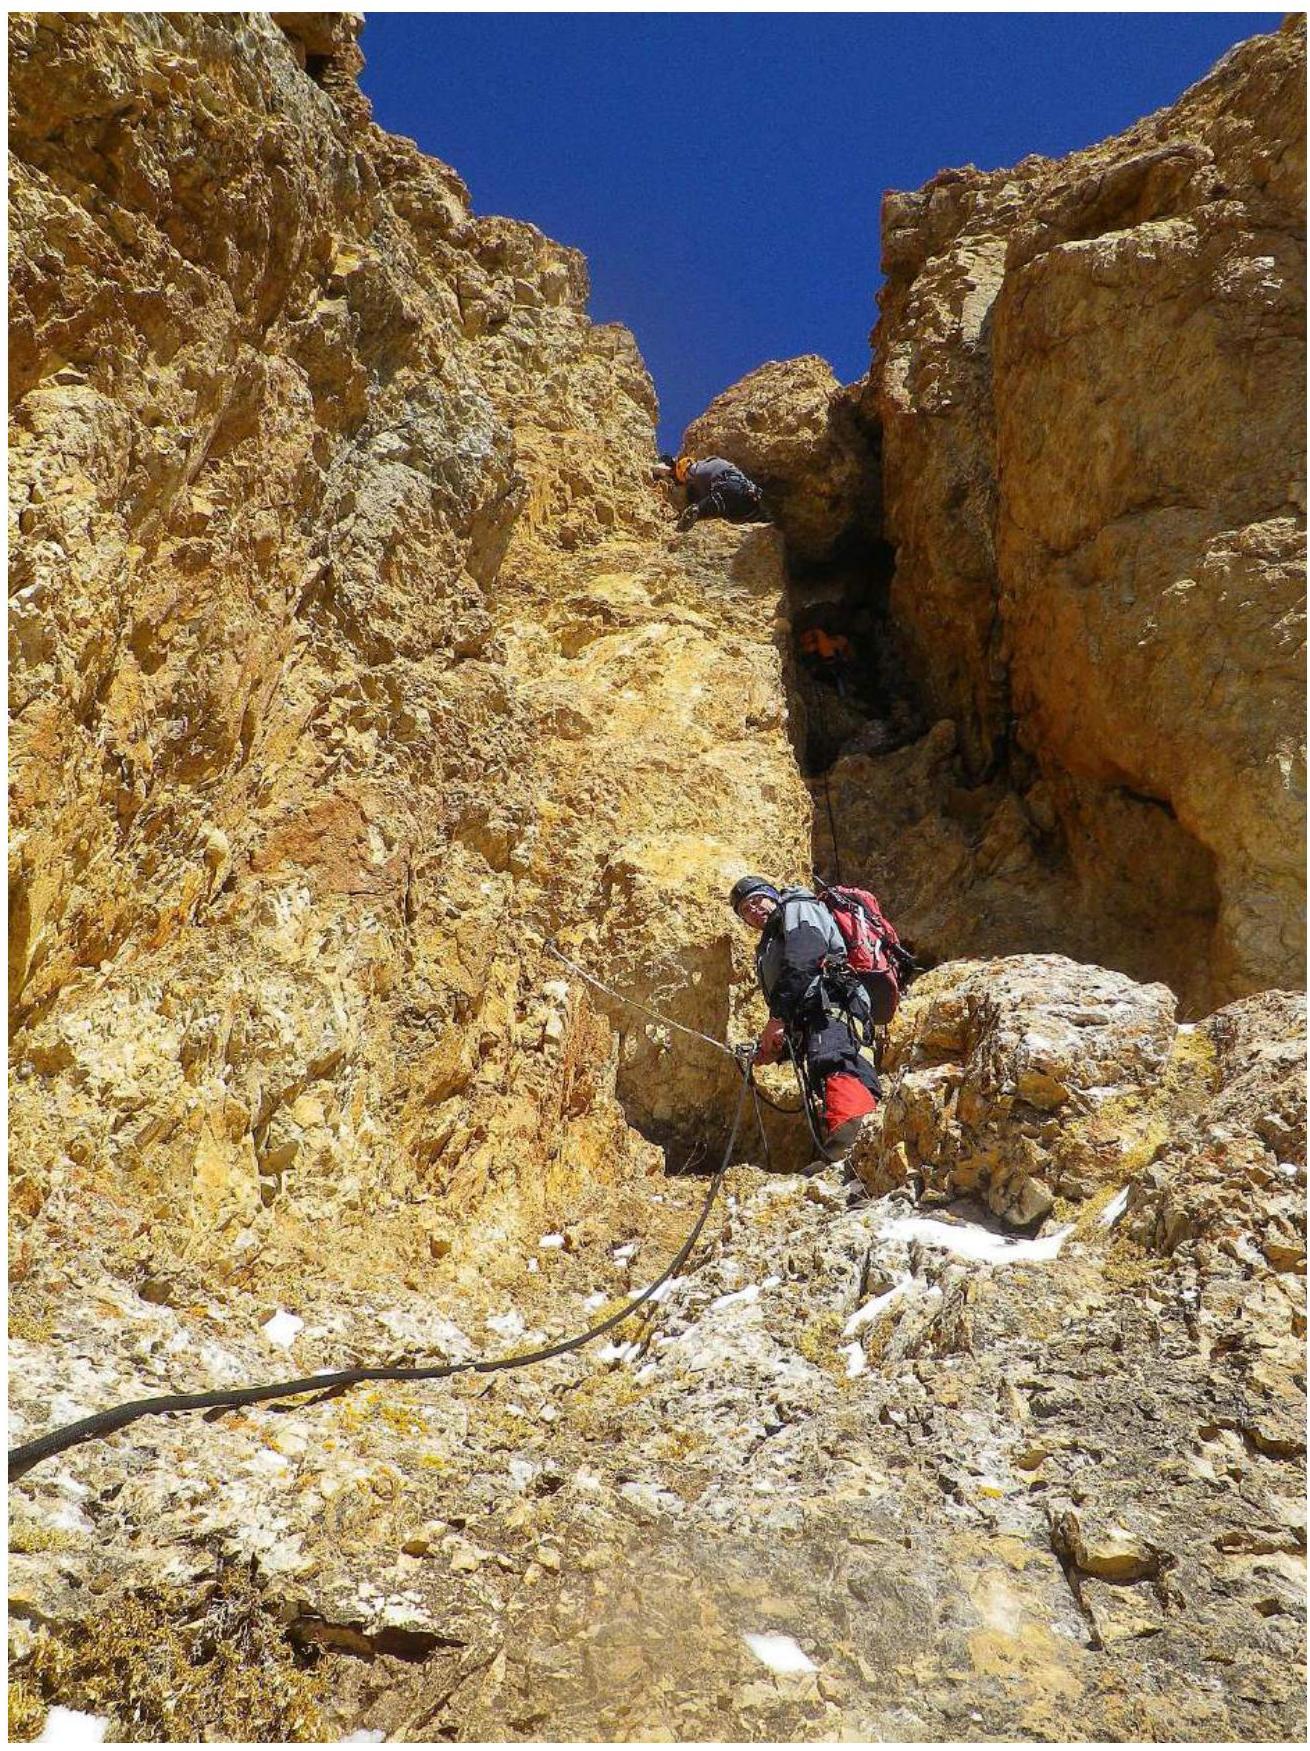
Fig. 10. P.Yu. Fominykh working on the key section, K.A. Mazurov belaying
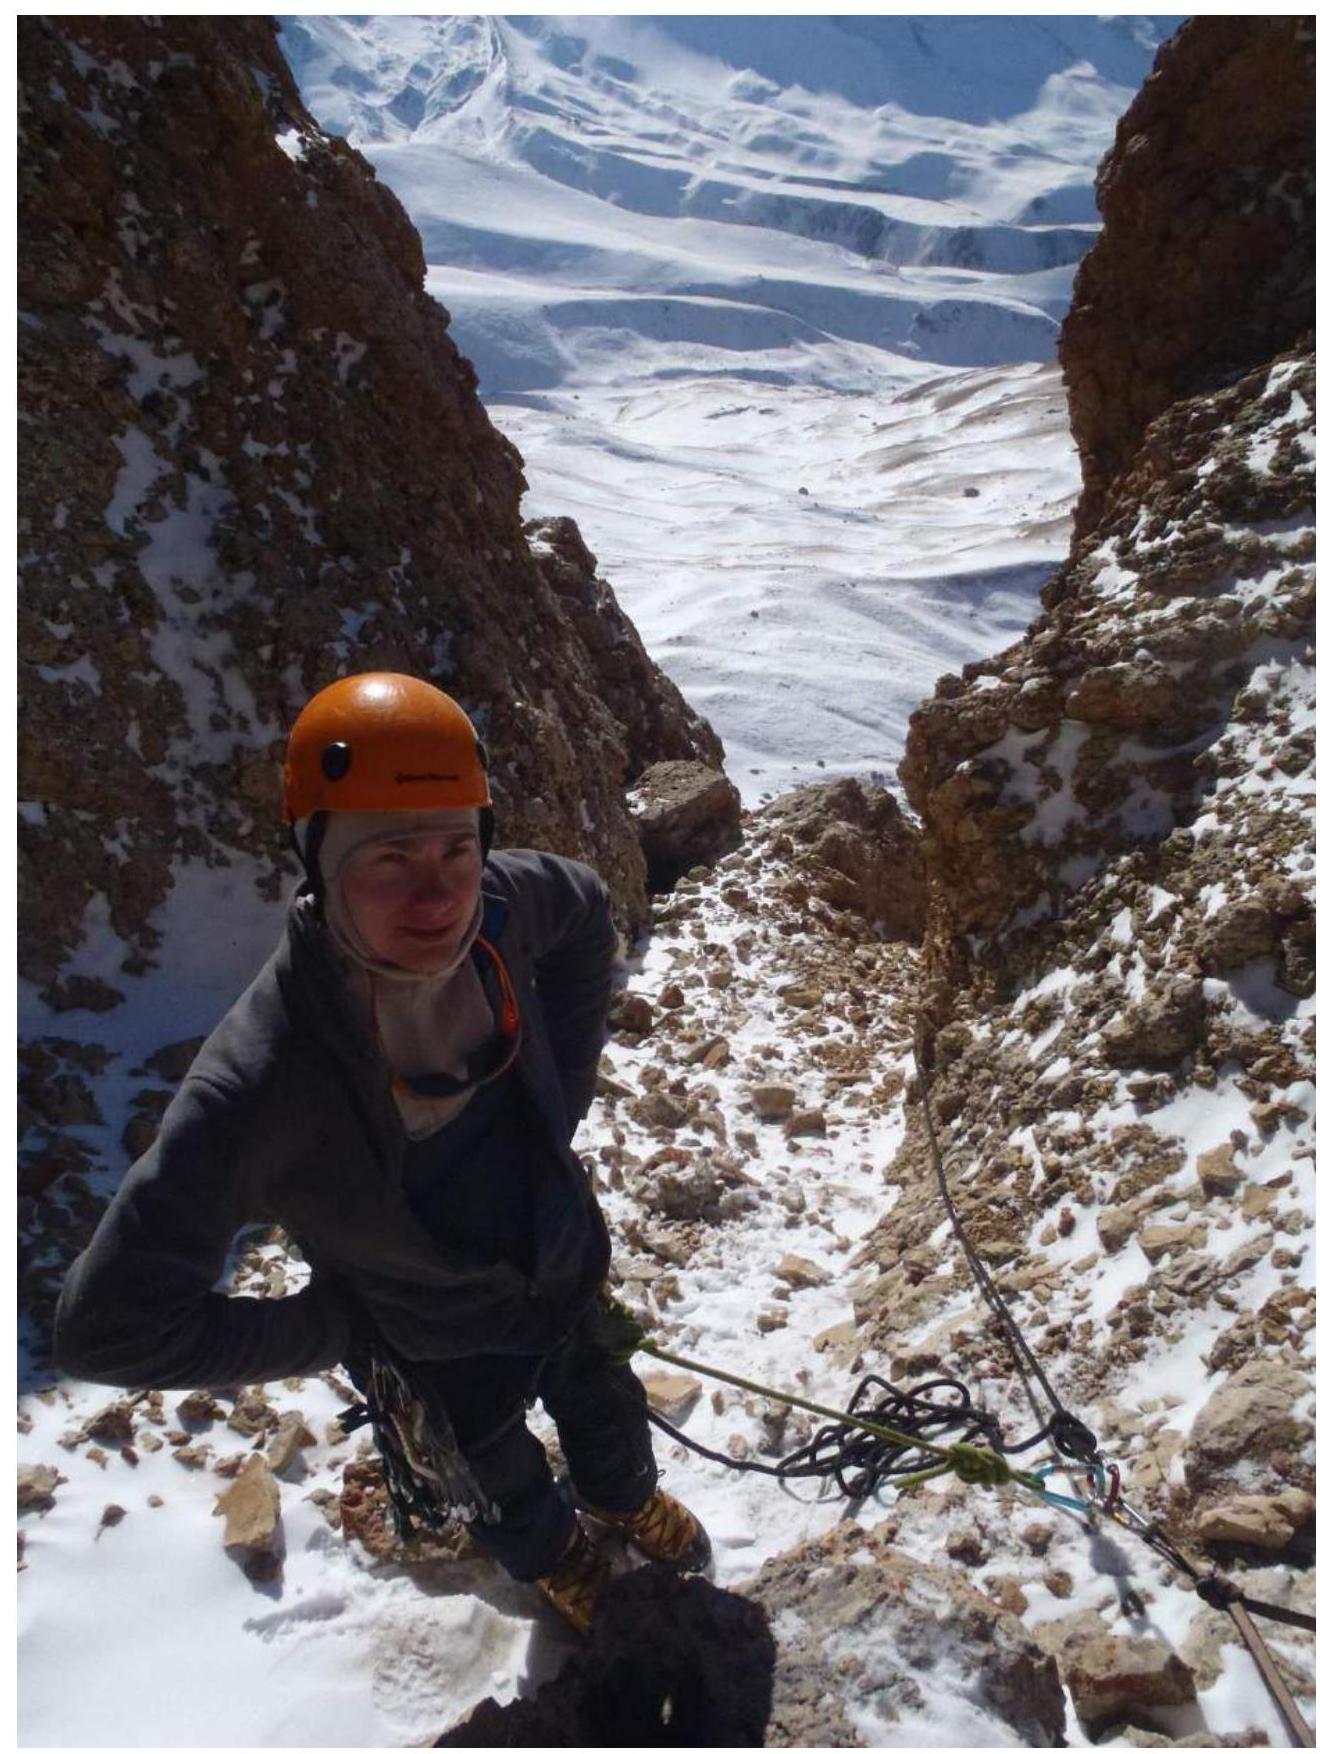
Fig. 11. P.Yu. Fominykh at the R3 station above the key section
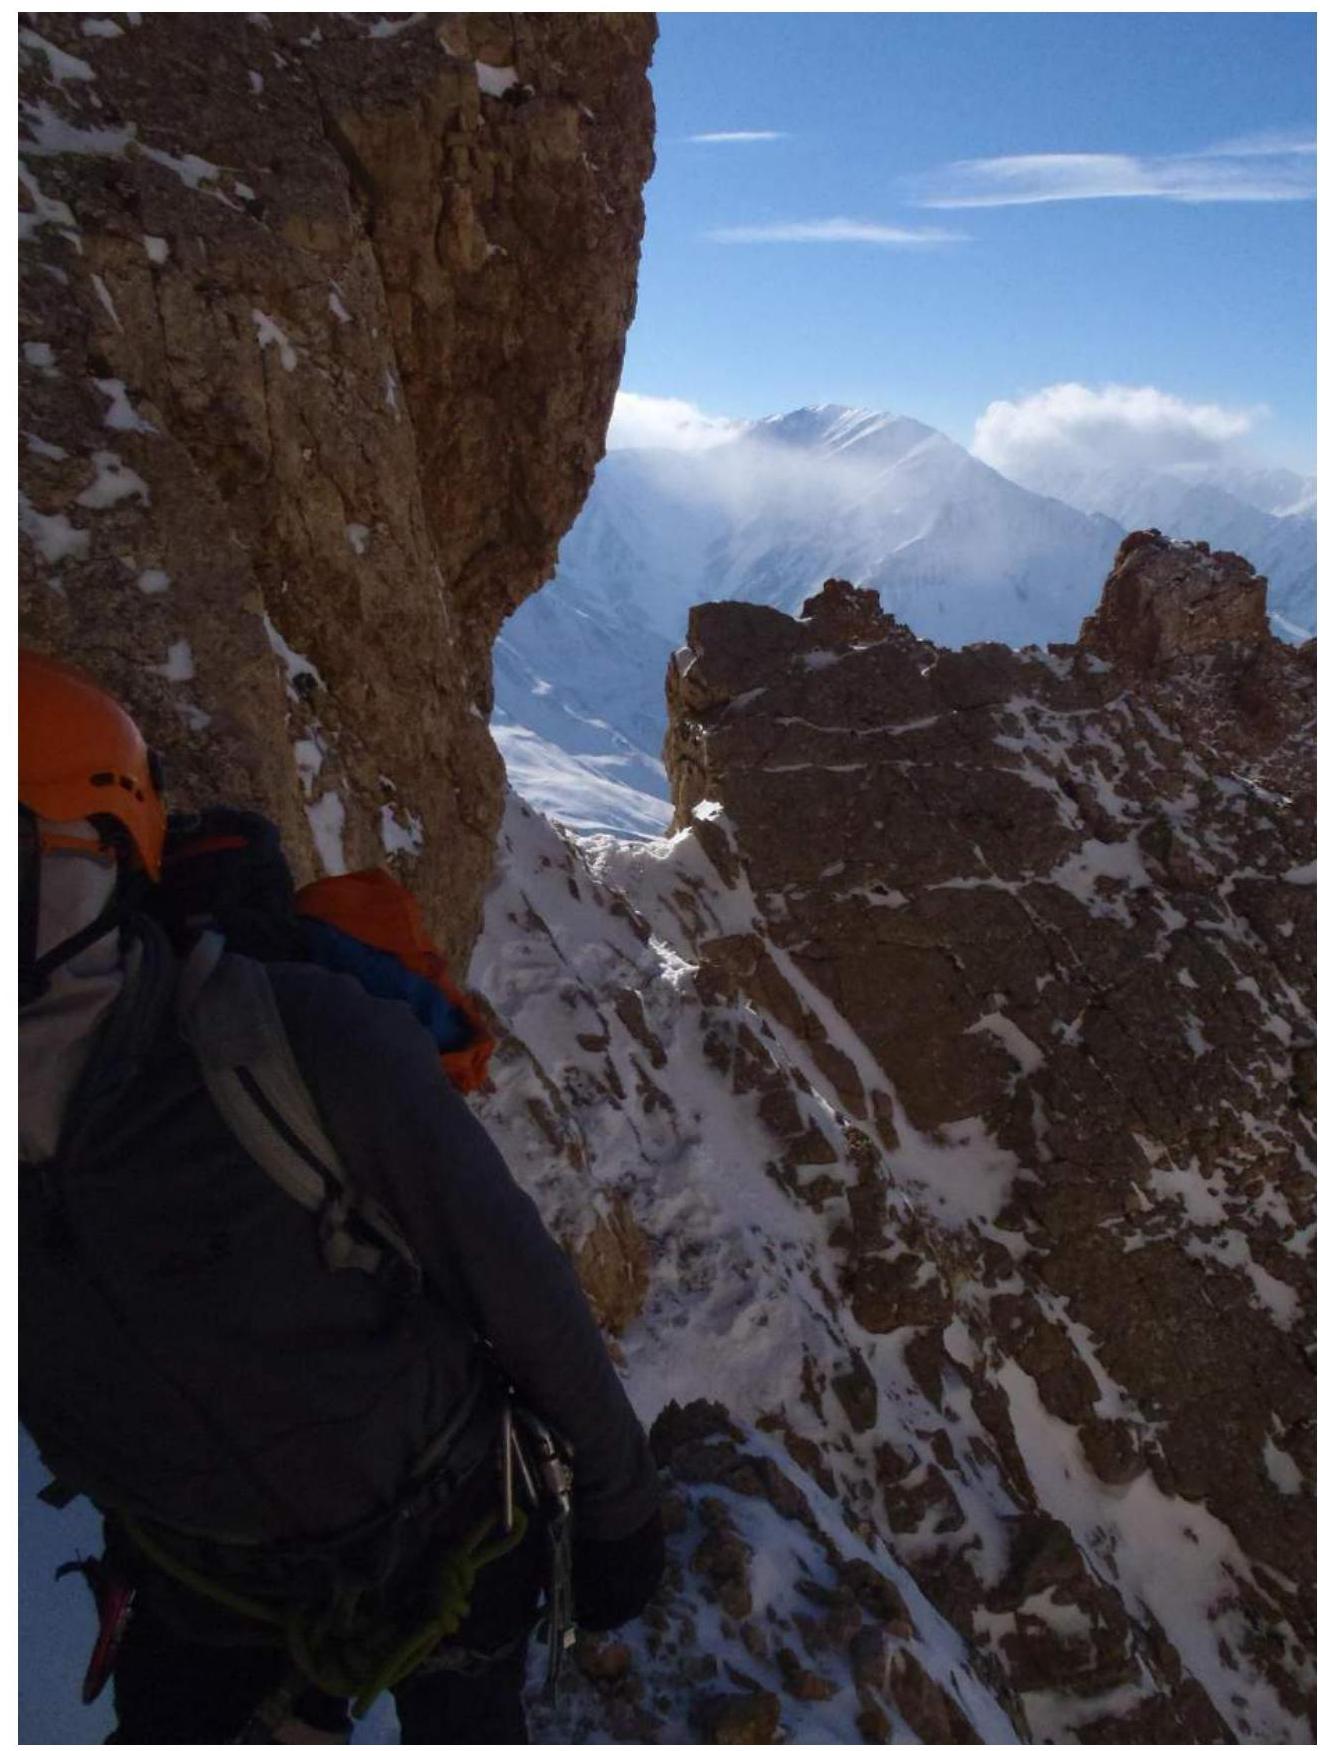
Fig. 12. Traversing the gendarme, R3 station behind the right rocky outcrop
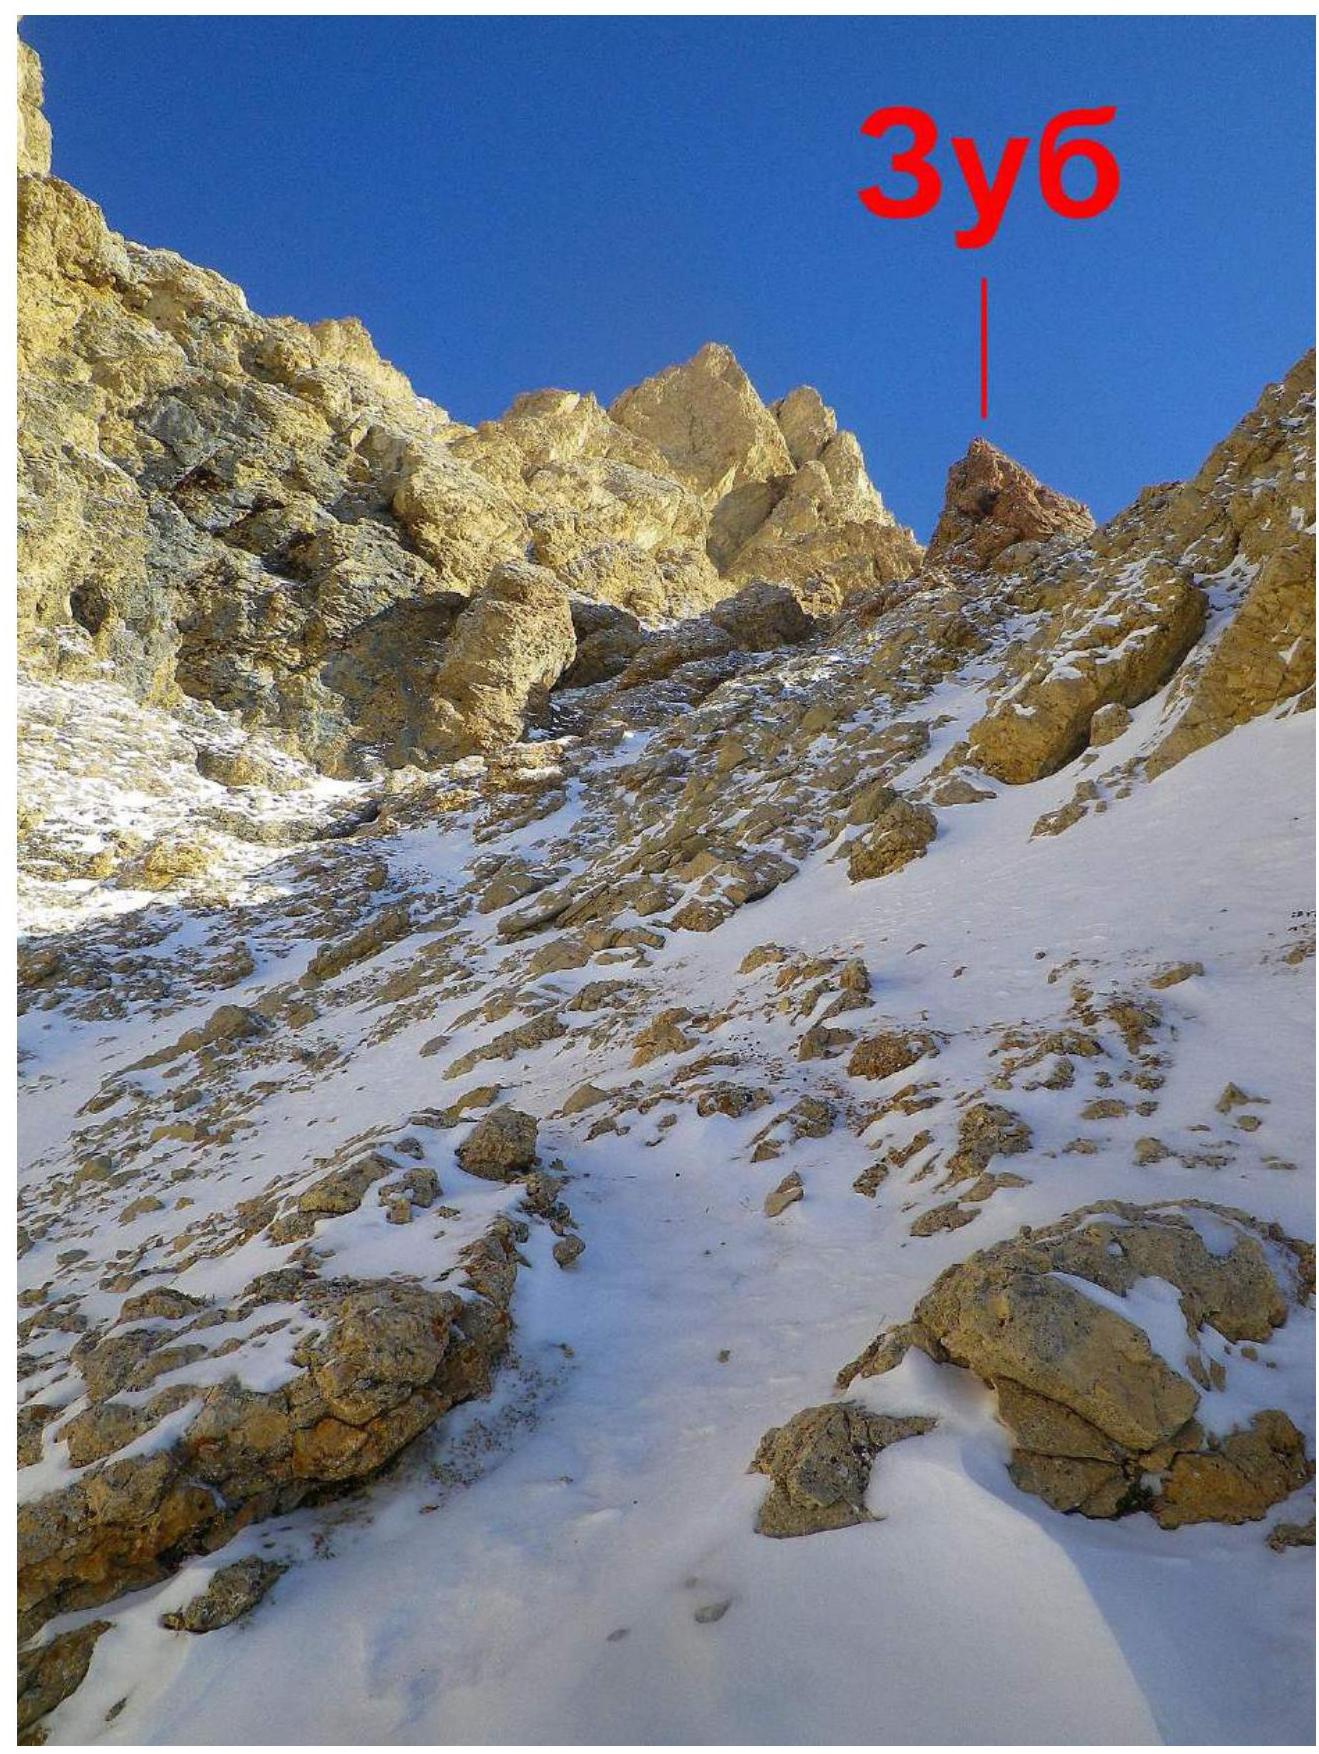
Fig. 13. R3–R4 section. The "tooth"
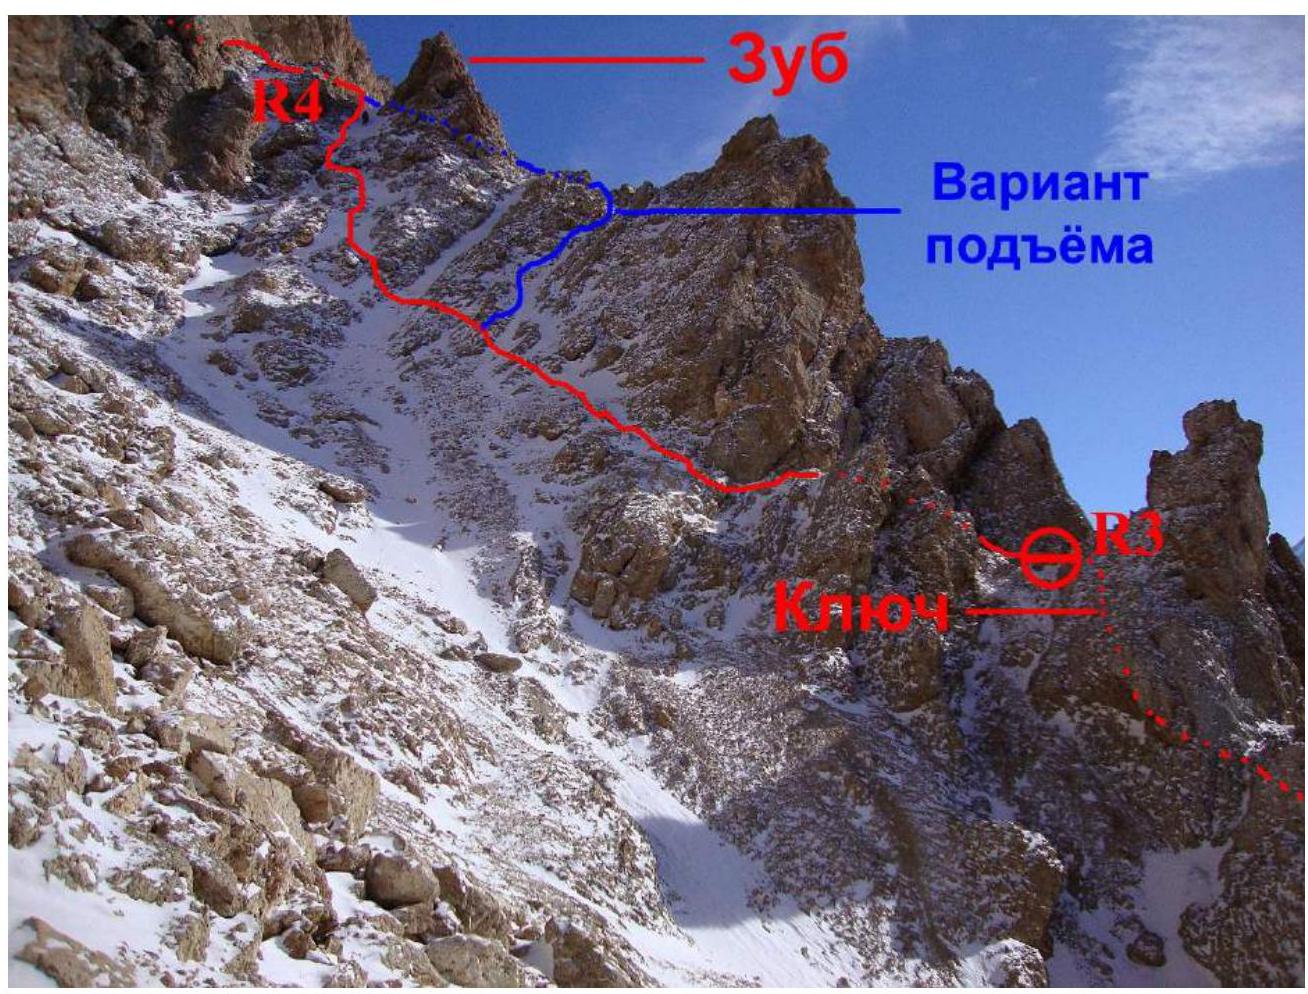
Fig. 14. R3–R4 section, photograph from the category 2A route on the Southwest couloir
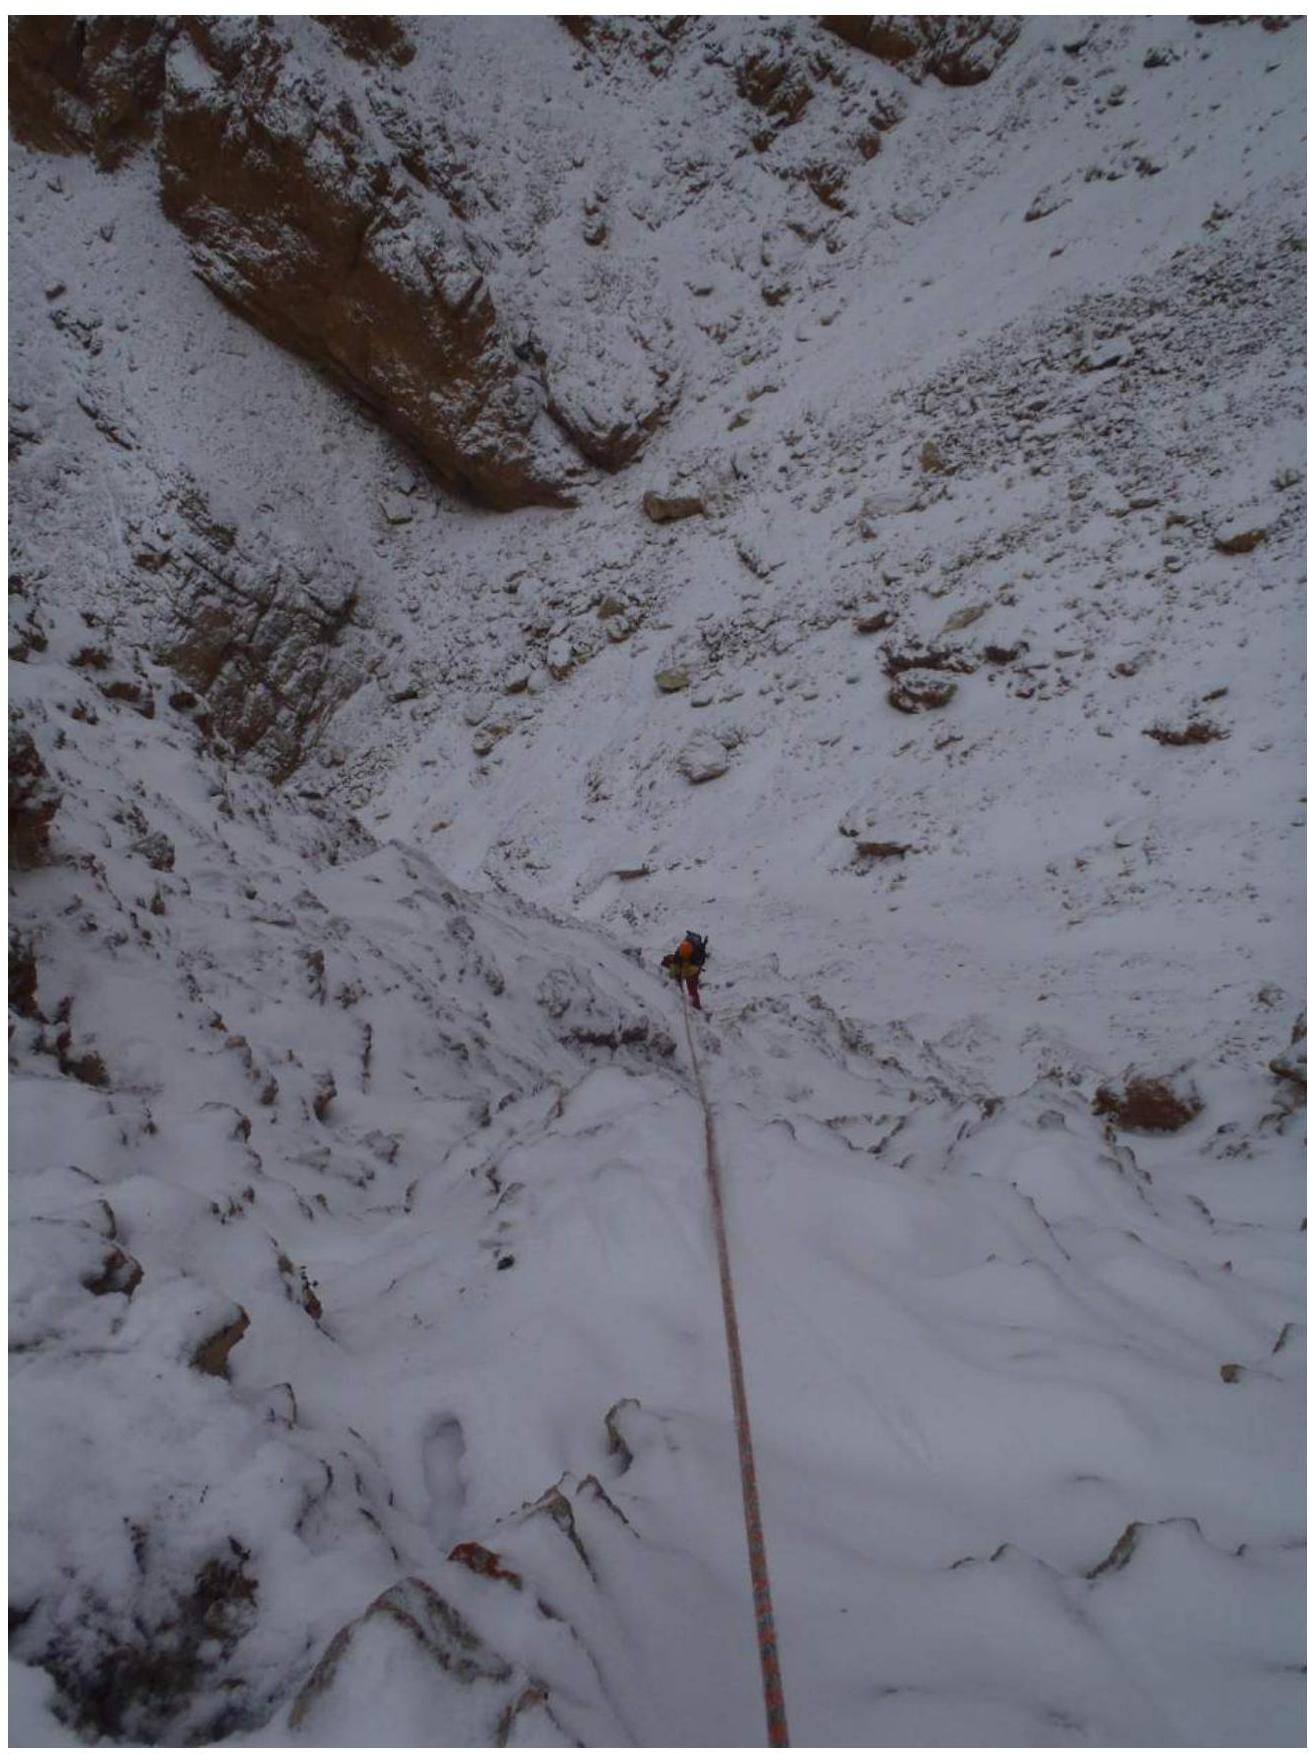
Fig. 15. Passage of the R3–R4 section in snowy conditions, 2011
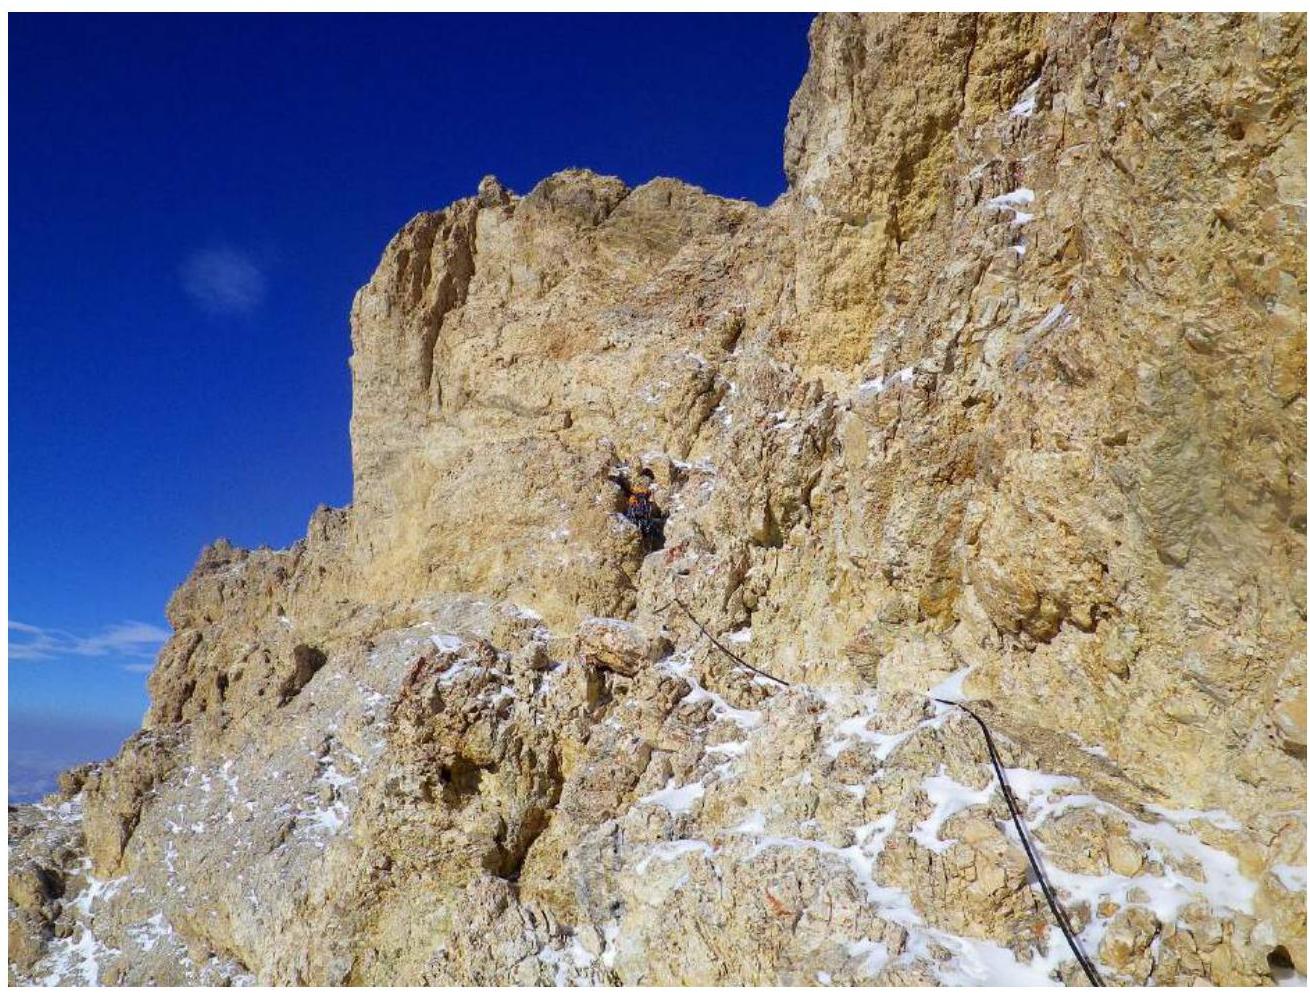
Fig. 16. P.Yu. Fominykh on the R4–R5 section
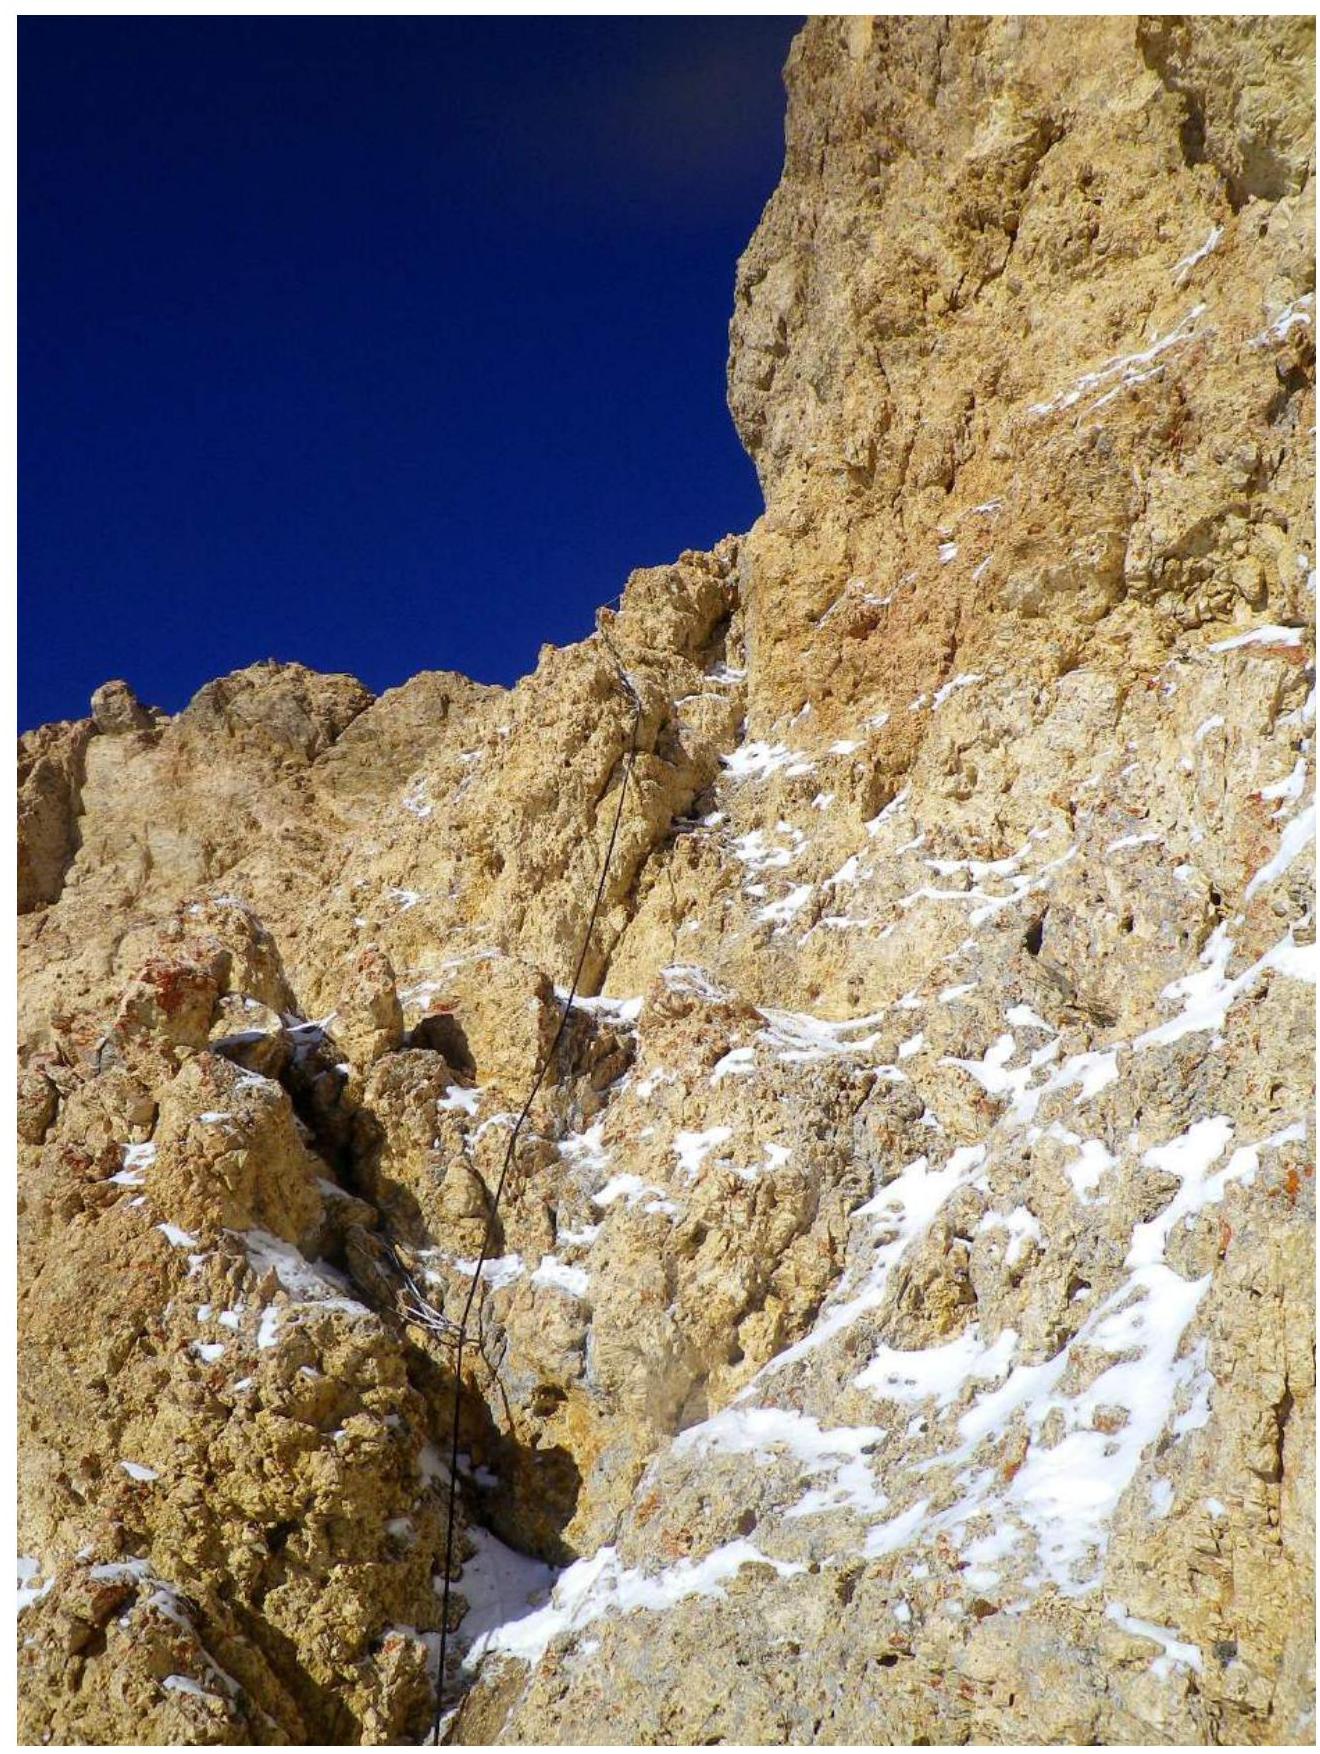
Fig. 17. R4–R5 section

Fig. 18. Chimney to the right of the R4–R5 section, not recommended to climb

Fig. 19. Exit to the scree ledge leading to the plateau

Fig. 20. Exit to the plateau

Fig. 21. P.Yu. Fominykh and D.E. Tsaregorodtsev at the summit
List of Equipment Used
Main rope — 1×50 m static, 1×50 m dynamic. Auxiliary rope — 5 m. Chocks — 1 set. Cams — 5 pieces (№0.5–№3). Quickdraws — 6 pieces. Climbing harnesses and other gear not listed.
Equipment List
Main rope — 1×50 m static rope, 1×50 m dynamic rope. Expendable rope — 5 m. Chock elements — 1 set. Cams — 5 pieces (№0.5–№3). Quickdraws — 6 pieces. Climbing harnesses and other equipment not listed. Locking carabiners — 3 pieces. Slings — 4 pieces. Jumar — 3 pieces.


